Line graphs: Create multiple series
❗ Important: The documentation in this topic refers to a feature or product that is currently in Early Availability status. Features in Early Availability status are only available in production to a limited number of customers based on fit with specific use cases. For more information about Early Availability status, see Product lifecycle phases. If you would like to use the product capabilities described here during the Early Availability phase, contact your AppDirect technical representative.
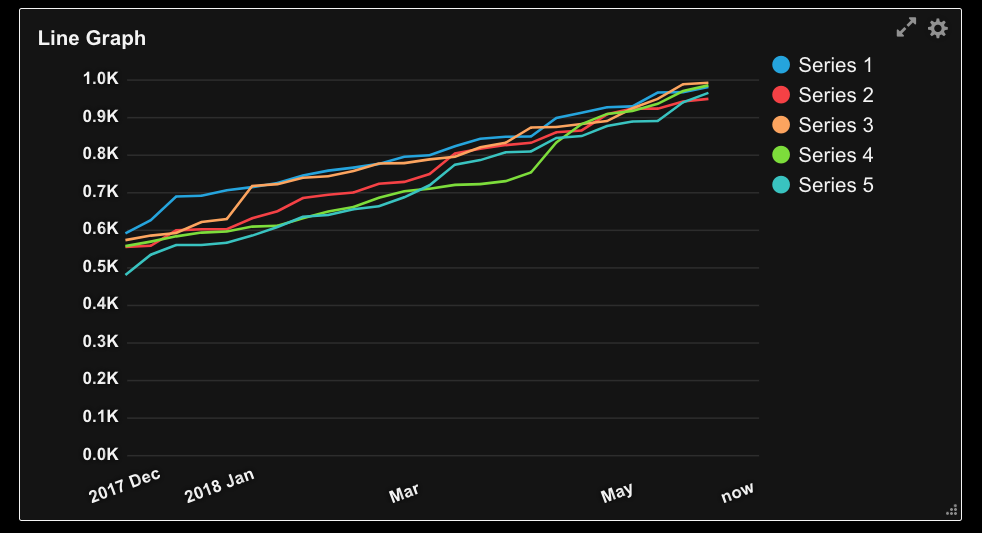
Being able to plot two or more lines on the same axis is a useful technique for comparing multiple data sets with comparative values. AppInsights lets you plot up to 5 series within one line graph widget, with the ability to mark each series with a unique color.
📝 Note: This tutorial is not service specific. You can use the line graph widget with a variety of different integrations, or using custom data. The instructions below assume that you have already successfully connected your data source to your line graph widget.
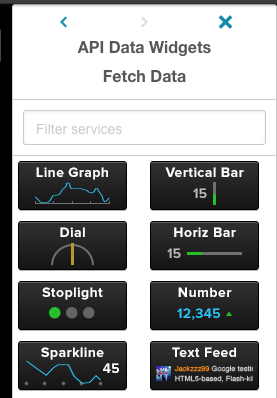
When you are ready to select a visualization for you data, select our line graph widget (not to be confused with the sparkline)

Click on the small gear icon on the widget and select the "Edit Widget Settings" menu.

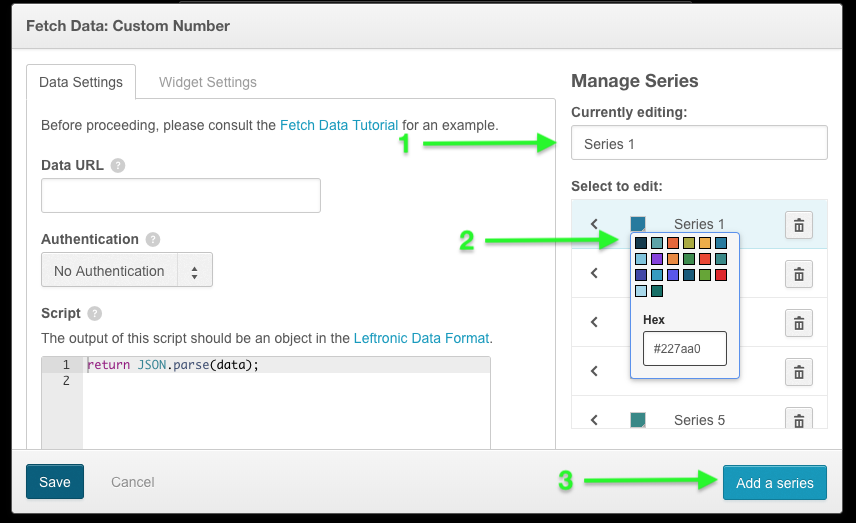
As normal, you will be defaulted to the standard "Data Settings" tab. On the right side of the window, you will notice a column titled "Manage Series". From here, you can change the name of an existing series (1), change the color of the series (2), or add a new series (3).
If you add a new series, you will want to be sure you tweak your data settings in some way, otherwise the series' settings will automatically be set to the defaults and you may end up with duplicate lines.

📝 Note: You can select from our default colors or add a custom color using a hex color code. If you choose the latter, you must press the "enter" button on your keyboard after entering the hex code for the color change to be confirmed.
Once you are done, click the blue "Save" button and your data will appear in your widget.

Was this page helpful?
Tell us more…
Help us improve our content. Responses are anonymous.
Thanks
We appreciate your feedback!